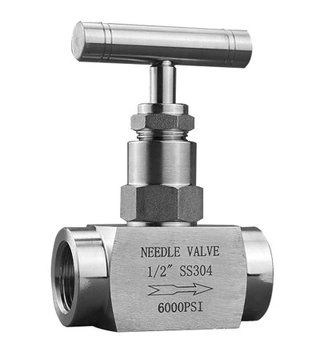
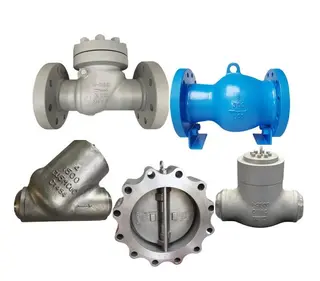
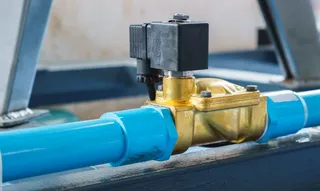
How to Install a Threaded Needle Valve
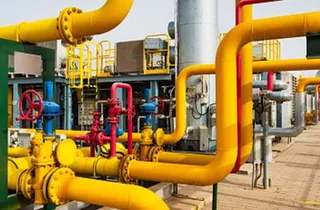
Threaded needle valves are common control elements in industrial fluid systems, widely used in instrumentation systems, oil and gas pipelines, water treatment, and the chemical industry. Although they are compact in size, the quality of their installation directly affects the sealing performance and operational safety of the entire system. This article provides a detailed introduction to the installation process of threaded needle valves, helping technicians master standardized operating methods.
Pre-Installation Preparation for Threaded Needle Valves
Before installing a threaded needle valve, sufficient preparation is key to ensuring smooth subsequent operations. This stage mainly includes four steps: confirming the valve status, verifying specification parameters, preparing necessary tools, and completing cleaning and inspection. Only by completing these foundational tasks can installation rework or equipment damage be avoided.
1. Confirm Valve Status
Threaded needle valves are usually installed in the closed state, but products from different manufacturers may vary. Before installation, carefully read the technical manual provided by the manufacturer to confirm the recommended installation status. At the same time, check the markings on the valve body; some products indicate direction using arrows or "OPEN"/"CLOSE" labels. This information is an important reference for subsequent operations.
2. Verify Specification Parameters
When selecting a valve, confirm that the following parameters match the actual working conditions:
- Connection type: Common types include NPT, BSPT, BSPP, compression fittings, or welded connections, which must match the actual pipeline system.
- Size specifications: Common sizes on the market include 1/8", 1/4", 1/2", 1", etc. Choosing the wrong size may result in failed connections.
- Material type: Choose stainless steel, brass, or special alloy materials according to the characteristics of the medium, ensuring corrosion resistance and strength meet requirements.
- Pressure rating: Industrial applications usually range from 3000 to 6000 PSI. High-pressure environments require higher-rated products.
- Sealing material: Including PTFE, metal seals, or elastomers. Different materials are suitable for different temperature and medium conditions.
3. Prepare Tools and Materials
Complete installation requires the following items:
- Tools: Pipe wrenches or open-end wrenches for basic tightening, torque wrenches for precise control of tightening force.
- Sealing materials: PTFE tape or sealant paste.
- Inspection supplies: Soap solution, leak detection spray, and clean lint-free cloths.
- Auxiliary materials: Use lubricants or anti-seize compounds according to manufacturer recommendations.
4. Cleaning and Inspection
Before installation, the following cleaning and inspection work must be completed:
- Pipe end treatment: Use suitable solvents to remove oil, debris, and machining residues from pipe ends and fittings, ensuring the connection areas are free of dust, metal fragments, or other contaminants.
- Thread inspection: Carefully check the threads on the valve and pipeline, ensuring surfaces are clean, undamaged, burr-free, and unblocked. If wear or dimensional deviation is found, repair or replace in advance.
- Flow direction confirmation: Verify whether the flow arrow on the valve body matches the system design. Although most needle valves support bi-directional flow, correct installation direction helps optimize performance.
Proper Use of Sealing Materials
After completing preliminary preparation, the next step is to properly handle sealing materials. The sealing effect of threaded needle valves largely depends on the correct use of sealing tape or sealant paste. Improper operation may lead to leakage or internal contamination. This section will detail the wrapping techniques for threaded sealing tape and the application points for sealant paste, while also noting sealing prohibitions for different connection types.
1. Wrapping Method for Threaded Sealing Tape
For threaded connections, applying PTFE sealing tape to external threads is the standard practice. The specific steps are as follows:
Start wrapping from the second thread from the end, winding clockwise for 2–3 turns.
Avoid excessive overlap during wrapping, maintaining a thin and even coverage.
Pay special attention to ensure the tape does not extend beyond the thread end to prevent fragments from entering the valve body and causing contamination or blockage.
2. Application of Sealant Paste
Alternatively, a thin layer of sealant paste can be applied to external threads, typically covering 2–3 threads from the end. Apply evenly and continuously, using a moderate amount. Too much may extrude into the system and cause contamination, while too little results in inadequate sealing.
Important tip: Compression or flared connections should not use any sealing materials. These connections rely on precise metal surfaces for sealing, and adding extra sealant may cause blockage or poor sealing.
Standard Installation Steps for Threaded Needle Valve
After handling sealing materials, proceed to formal installation. Standard installation steps include accurate alignment, manual pre-tightening, and tool tightening, each with clear operational points and precautions. Correct installation order not only ensures connection reliability but also effectively prevents valve body damage and deformation of internal components.
1. Alignment and Preliminary Connection
Align the valve accurately with the pipe or fitting, ensuring the flow arrow on the valve body matches the medium flow direction. Thread the valve in manually; this step aims to avoid cross-threading damage, ensure initial alignment, and feel whether the threads fit smoothly.
Resistance should increase evenly.
If binding or abnormal resistance occurs, stop immediately and inspect; do not force.
2. Tightening Operation
After hand-tightening, use a wrench for final tightening. Tightening degree depends on connection size and material. Generally, after hand-tightening, turn an additional 1/2 to 1-1/2 turns. If the manufacturer provides torque specifications, use a torque wrench for precise control. For example, a 1/2" stainless steel valve usually requires 30–35 Nm. High-pressure systems may require hydraulic torque tools to safely achieve specified torque.
Special attention: Over-tightening is the most common installation error and may cause valve body cracking, deformation, or internal component damage. Tighten gradually and monitor the valve.
3. Key Points for Different Connection Types
- Threaded connections: Use sealing tape or paste and strictly control torque.
- Compression connections: No sealing material; ensure ferrules are properly seated.
- Welded connections: Protect from heat to avoid internal component damage.
- Panel installation: Pay attention to hole sizes and secure with appropriate nuts.
Post-Installation Testing and Verification
- Pressure Test: After installation, slowly pressurize the system: Increase pressure gradually to avoid shocks. Test pressure is usually 1.5 times the working pressure. Gradually raise pressure and stabilize at each stage to observe.
- Leak Detection: Apply soap solution or professional leak detection fluid to joints and threads, observing for bubble formation. The method depends on the application: Soap solution is economical and practical for general use. Gas systems are recommended to use professional leak detection fluids for higher accuracy. Critical applications should use electronic detection or helium testing. If leakage is found, lightly retighten but do not force. If unresolved, disassemble and reinstall.
- Functional Test: Operate the handwheel to check valve opening and closing smoothness and confirm: Complete closure without internal leakage. Full opening with normal flow. Smooth full-stroke operation without binding. Reliable sealing in the closed state. For valves connected to instruments or control systems, interlock testing is required to ensure correct signal transmission and control logic.
- Record Keeping: Record test results completely, including pressure test values, leak detection, operational performance data, installation date, and personnel information. These records are valuable references for future maintenance.
Special Requirements for Different Applications
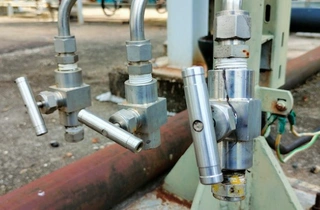
- Instrumentation Systems: Instrument pipelines often have limited space. Dual ferrule fittings are recommended for compact layouts. During installation, protect sensitive instrument components and avoid transmitting stress to measurement devices.
- Oil and Gas Pipelines: Oil and gas environments impose strict requirements. Valves should exceed 6000 PSI rating and withstand extreme temperatures. Follow explosion-proof work protocols during installation.
- Water Treatment Systems: Water treatment commonly uses brass or stainless steel valves with EPDM seals. Ensure compatibility between sealing materials and treatment chemicals to prevent corrosion.
- Chemical Industry: The diversity of chemical media requires strict verification of chemical compatibility with sealing materials. Consult chemical compatibility tables or manufacturer technical support if necessary.
- Cleanrooms and Laboratories: High-purity applications require valves with special cleaning and packaging. Installation must be conducted in a clean environment to prevent contamination.
Common Installation Errors and How to Avoid Them
- Confusing Thread Standards: Mixing BSP and NPT threads is common and may cause loose connections or thread damage. Use a thread gauge to confirm thread type, and use adapters if necessary.
- Over-Tightening: Over-tightening may deform the valve body, damage threads, or cause internal component failure. Avoid this by using torque wrenches, following manufacturer parameters, and feeling resistance during tightening.
- Skipping Leak Tests: Some installers skip leak tests to save time, creating safety risks. Standardized testing procedures must be established and enforced.
- Ignoring Flow Direction: Although most needle valves are bidirectional, correct flow orientation helps optimize regulation. Always confirm the arrow direction matches system design.
- Misuse of Sealing Materials: Applying sealant to compression fittings may cause blockage or poor sealing. Always select the correct sealing method according to connection type.
Conclusion
Proper installation of threaded needle valves relies on three core elements: appropriate component selection, standardized installation procedures, and comprehensive testing. From pre-installation preparation to final test records, each step must be strictly followed.
High-precision industrial fluid systems require leak-free connections at every joint. By mastering the installation points introduced in this article, technicians can effectively avoid common errors, ensure the needle valve performs its intended control function, extend equipment life, and ensure production safety. For specific brand or special-condition installation requirements, it is recommended to contact the manufacturer directly for detailed technical support.
Send your message to this supplier
Related Articles from the Supplier
How to Install a Threaded Needle Valve
- Mar 20, 2026
How to Install Swing Check Valves
- Mar 23, 2026
How to Properly Install Steam Traps: Complete Guide
- Dec 24, 2025
How to Choose Valves for the Chemical Industry
- Jan 13, 2025
How to Prevent Leakage in Steam Trap?
- Sep 18, 2025
How to Choose the Right Plug Valves?
- Oct 15, 2025
How to Choose the Appropriate Check Valves?
- Oct 21, 2025
Related Articles from China Manufacturers
How to Install a Cam Lock?
- May 09, 2020


How to Easily Install a New Door Lock
- Jul 02, 2024
How to Properly Install a Control Valve
- May 30, 2024
Related Products Mentioned in the Article
Zhejiang Kosen Valve Co., Ltd.
- https://www.kosenvalve.com/
- Business Type: Industry & Trading, Manufacturer,
Supplier Website
Source: https://www.kosenvalve.com/media-hub/how-to-install-a-threaded-needle-valve.html