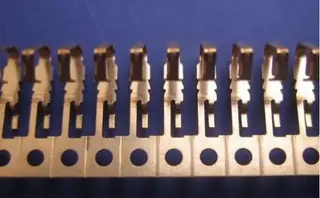
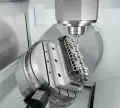
The Cause and Solution to Hardware Stamping Defect
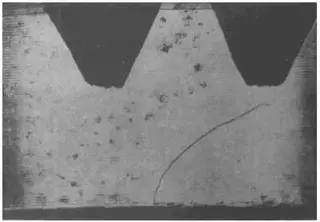
1.produce the stamping scrap
1) cause
Inferior materials
The stamp die do not install, adjust and use properly.
The operator doesn't feed material along the fixed position or doesn't guarantee the feeding along the fixed gap.
As the die is long time used, the gap is changed or the working part or the guide element is worn.
As the die has long time impact vibration, the fixed part is loose and the position of the die is changed accordingly.
The operator is careless and do not operate according to the instruction.
2) solution
The raw material should coincide with the stated technical conditions(check the specification and brand of raw material strictly. If the condition is allowed, detect and check the working parts which requires high size precision and appearance quality).
Observe every links of the technological procedure strictly and comprehensively;
Please keep all the press machine, die and other working equipment under the normal working condition.
Establish the strict inspection system during the manufacture. Please take a whole examination for the first die, do not produce until it pass examination. At the same time strengthen the routing inspection. When the unexpected things happen, please settle them in time.
Insist on civilized production system, like the working part and the billet body should be conveyed by the proper working position apparatus, or the working part surface would be crushed and scrubbed seriously and which effect the surface quality.
2.stamping part burr
1) cause
Uneven hardware stamping gap
The cutting-edge of the stamp mold becomes blunt.(Blunt cutting-edge of the stamp mold)
As vibration and impact in a long-term, the center line of the punch and die has changed. The axis is noncoincident and has produced the single-side burr.
2) Solution
Guarantee the processing precision and assembly quality of the punch and die. Guarantee the verticality and durability of the side pressure of the punch and stiffness of the whole stamp.
When installing, the proper gap between punch and die should be guaranteed. The punch and die surface should be parallel with the working surface of the press machine.
The press machine should have good stiffness. Besides, small elastic deformation, high track precision and parallel degree of the plate and slide block are required. The press machine should have enough stamping power.
The allowable burr height of the shear cross section
>0.3>0.3-0.5>0.5-1.0>1.0-1.5>1.5-2.0
The thickness of stamp sheet>0.3>0.3-0.5>0.5-1.0>1.0-1.5>1.5-2.0
New testing mold burr height ≤0.015≤0.02≤0.03≤0.04≤0.05
3.The allowable burr height in production.
The stamp part produces buckling deformation
1) cause
The gapped force and the counterforce don’t produce the torque at the same line. (The gap between punch and die is too big, the cutting edge of the die has the back taper or the contacting area between the ejector and the stamp part is too small, all of these will produce buckling deformation).
2) solution
Stamping gap should be reasonable.
The die structure should add the pressure plate (or retainer plate). The sheet should contact with the pressure plate surface and has definite pressure. The pressure plate (retainer plate) contact should be increased and add certain pressure.
Inspect the cutting edge of the die. If there finds any inverse taper, the cutting edge must be repaired properly.
If the shape of stamping part is too complicated and there are many inner holes, it would cause uneven shearing force, please increase the power of pressure plate and compress tightly on the sheet metal strip or use the high precision pressure machine for stamping. The metal sheet should be leveled before stamping. If the duckling deformation still can not eliminate, after stamping, the working part can be leveled again. Clear the impurities in the intracavity of the die. Lubricate the surface of the thin metal sheet. And design the oil through on the die structure.
4. The precision of the out edge and inner hole of stamp part is degraded and the size is changed.
1)Cause
Locating pin and stop pin have changed the position or wear greatly.
The operator’s carelessness makes the feeding deviate from front, back, left and right.
Too low, narrow or wide size precision of the bar stock will make the feeding too difficult to reach the fixed place. The bar stock will deviate from front or back in the feeding sheet. Thus the inner hole and the shape of the stamping part will deviate from front or back greatly.
5.When the hardware stamping part is bent, it is not qualified in the size of shape.
1) Cause
The material rebound results in product failure.
The locating apparatus wears badly. It leads to the inaccurate position of the bar stock. The locating apparatus should be replaced.
In the non oriented bent die, when the pressure machine adjusts upwardly, if the dead position under the pressure machine and the slipping block is not adjusted properly, it will result the bent stamping part unqualified in shape and size.
The die pressing sheet equipment doesn't work or lose control. The pressure force should be readjusted or the pressure force should be replaced so that it can work normally.
2)Solution to reduce the rebound
Choose the stamping sheet with big spring mold power, small yield point and stable mechanical property.
The sheet should be annealed before bending. Soften the cold hardening material before bending.
When the deformation hardly be eliminated during the stamping, the punch and the die should be replaced or be adjusted in inclination in order to make the gap equal or less to the smallest sheet.
Increase the contacting area of die and stamping part. Reduce the contacting area of the punch and stamping part.
Take the steps by "overcorrecting" to decrease the effect of the rebound.
6. The bent part produces crack in the bent position.
1) Solution
Eleminate the burr on the out edge of the bending. The burr will cause the stress concentration. Reduce the bending deformation and clear the burr on this area.
Put the burr side on the inner side of bending die.
When putting the bent part, makes the bending direction perpendicular to the fiber direction of the sheet(rolling direction).
The bending radius can not be too small. If the quality is allowed, the radius should be made as long as possible. The surface of the bending part should be clean without any hump or scar.
Anneal it during bending so as to eliminate the inner pressure. The softened bending part seldom produces the cracks.
Please do put on lubricating oil on the big bent part when bending to reduce the friction.
7. The bent part will deviate during the bending process.
1) Cause
The embryo will slide along the die surface during bending process and cause friction. If the difference between the two sides friction is too big, the embryo will move to the bigger side.
2) Solution
For the configurational asymmetry of the bent part, choose the symmetry bending(for the single side bent part choose to two ones together in symmetry for bending and then devide).
Add the elastic pressure sheet device on the bent die so as to prevent the movement of the embryo during bending.
Choose inner hole and out looking location to make its position precise.
8.scratched surface of bent part
1) Cause and solution
For the continuous working of copper and the aluminum alloy and other soft material, the metal particles or dregs will easily attach on the working part surface and make the part galled greatly. At that time, we should analyze and research carefully on the shape and lubricating oil and so on to avoid the appearance of the particle and dreg and produce the scratch.
If the bending direction and the sheet rolling direction is parallel, the part surface will be cracked and decrease the quality of the part surface. If bend on more than two parts, please try best to guarantee a certain angle between bending direction and rolling direction.
If the burr surface regarded as outer edge when bending, there will easily produce the cracks and galls. Thus take the burr area as the inner side of the bent part when bending.
If the die round radius is too small, the bending part will have the impact trace. Polish the die and increase its round radius, will avoid the gall of bent part.
The gap between punch and die should not be too small. If the gap is too small, the part will become thin and galled. During the stamping, the gap variation should be checked timely.
If the punch gets into the die too deeply, there will produce galled surface on the part. Thus ensure it won't being influenced by the springback, the depth which the punch entering into the die should be reduce to some extend.
In order to make the part fit for precision request we usually use the bent die which the pressure material is on the bottom. Thus when bending, the spring, position pin hole, pallet and discharging hole are all be pressed into trace, so they should be adjusted.
9. The embryo hole moves when bending
1) Cause
The size and position of hole is not correct.(It becomes thin during bending).
The center of the hole is different.(The bending height is not enough high, the embryo is moving and rebounding. The bending surface is fluctuating.
The bending line and the center line between two holes is not parallel. The position which the bending height is less than the smallest bending height becomes like the shape of opening mouth outwards.
The hole which is close to the bent line easily deforms.
2) Solution
If the size and position of the hole is not correct, it is necessary to control the bending radius, bending angle and sheet thickness strictly, repair the neutrosphere of the sheet and the depth, which the punch entering into the die should be appropriate even.
The solution to the different center of the holes:
Make sure the correct height of the right and left bending.
Repair the wearing position pin and position sheet.
Reduce the springback so as to guarantee the parallel degree and flatness.
Change the technique routine. Correct bending first and then punching.
The solution to opening mouth shape outwards:
Guarantee the smallest height during bending. H(H≥R+2t t sheet thickness R the bending radius).
Change the processing part outlooking. Without the influence by the usage, get rid of the part which is less than the smallest bending part.
The solution to the deformation of hole caused by the bending part:
When designing the bending part, please guarantee the distance from bending part to the hole X should be greater than a certain digit X≥(1.5—2.0)t t the thickness of the bending sheet.
Design a via hole at the bending part to attract the bending deformational stress. This can prevent the deformation of the hole close to the bending part. Usually choose bending first and then stamping.
10. The part becomes obviously thin after bending:
1) Solution
The bending radius is too small comparing to the sheet thickness(r/t>3 right angle bending) usually choose to increase the bending radius.
Multi-angle bending makes the bending part thinner. In order to reduce thinning, please choose the bending method of single-angle multiple operation.
If we use the sharp punch for entering the die, the thickness of the bending part will decrease obviously when the depth is too big.
11. The flange of drawing part becomes wrinkled during the drawing.
1) Cause
The edge pressure of the flange part is small. It can not afford the super cutting pressure. This causes the deformation of the cutting direction. Thus it forms wrinkle after losing stability. If the sheet is too thin, it causes the wrinkle easily.
2) Solution
Increase the edge pressure on the pressure circle and add the thickness of the sheet properly.
12. The cause and prevention for the crack of drawing wall part.
1) Cause
The sheet bears too much radial tensile pressure when drawings.
The round angle radius of the die is too small.
The lubricating of the drawing is not good.
The plasticity of the rawl material is too bad.
2) Solution
Reduce the edge pressure.
Increase the round angle radius of the die.
Use the lubricating oil correctly.
Choose the good material or increase the annealing process.
13. The bottom of the drawing part is shattered.
1) Cause
The round angle radius of the die is too small. The sheet is in the state of being cut.
2) Solution
(It usually occurs in the initial state of the drawing.) Increase the round angle of the radius of the die and makes the smooth surface roughness smaller than the usual Ra<0.2µm.
14.The edge of the drawing part is uneven and wrinkled.
1) Cause
The embryo doesn’t conform to the center of the punch and die. The sheet thickness is uneven. The round angle radius of the die and the gap between punch and die is uneven. The round angle radius of the die is too big and during the last stage of the drawing, it leaves the pressure circle. And makes pressure circle, which haven’t passed the round angle and doesn’t press the round angle and becomes wrinkled. After that, it is drawinged into die and forms into peristoma fold.
2) Solution
The die should be relocated. Correct the round angle radius of the die and the gap between punch and die, makes them even and then put them into production(reducing the round angle radius of the die or choosing the arc pressure ring equipment will eliminate the fold.
15.The tapered part or the hemispherical part is wrinkled in the waist when deep drawing.
1) Cause
At the beginning of the drawing, most material are in the dangling state. Also the edge pressure is too small. And the round angle radius of the die is too big or the lubricating oil is over used. These makes the radial tensile stress small and the material loses the stability under the cutting pressure and get wrinkled.
2) Solution
Increase the edge pressure or choose the rolling steel structure. Reduce the round angle radius of the die or add a few thickness of the sheet.
16. The drawing part produces drawing trace on the surface.
1) Cause and Solution
The surface of punch and die is crushed. This cause the drawing stamp on the part surface. We should repair or polish the crushed surface.
The over small or uneven gap of the punch and die will scratch the part surface when drawing. The gap between punch and die should be adjusted to be fitness.
The round angle surface of die is rough. The part surface will be scratched when drawing.
The round angle radius of die should be polished and repaired.
As the operation surface and the sheet surface of the die is(are) not clean during the stamping, the sundries would sneak into it, thus the part surface is crushed. Therefore when drawing the surface of the punch and die should be clean. The billets should be scrubbed before drawing.
When the rigidity of die is slow, if there are metal sweeps attached on its surface, the drawing part will produce the drawing stamp. Besides increase the rigidity of the punch and die surface, we should take frequent check of the punch and die surface when drawing and get rid of the metal sweeps in time. The poor quality of the lubricating oil will increase the surface roughness of the part when drawing. We should choose the lubricating oil during fit for the drawing technology. If necessary, the lubricating oil should be filtered before use. These will prevent the sneaking of the impurity and scrubbing of the surface.
17. The straight wall part of the drawing is not flat.
1) Cause and Solution
There is no air hole on the punch. Because of air compression, the punch surface gets deformed and becomes unfair. The air hole should be added.
The rebound of the sheet will also makes the drawing part unfair. The reshaping procedure should be added in the last stage.
1) cause
Inferior materials
The stamp die do not install, adjust and use properly.
The operator doesn't feed material along the fixed position or doesn't guarantee the feeding along the fixed gap.
As the die is long time used, the gap is changed or the working part or the guide element is worn.
As the die has long time impact vibration, the fixed part is loose and the position of the die is changed accordingly.
The operator is careless and do not operate according to the instruction.
2) solution
The raw material should coincide with the stated technical conditions(check the specification and brand of raw material strictly. If the condition is allowed, detect and check the working parts which requires high size precision and appearance quality).
Observe every links of the technological procedure strictly and comprehensively;
Please keep all the press machine, die and other working equipment under the normal working condition.
Establish the strict inspection system during the manufacture. Please take a whole examination for the first die, do not produce until it pass examination. At the same time strengthen the routing inspection. When the unexpected things happen, please settle them in time.
Insist on civilized production system, like the working part and the billet body should be conveyed by the proper working position apparatus, or the working part surface would be crushed and scrubbed seriously and which effect the surface quality.
2.stamping part burr
1) cause
Uneven hardware stamping gap
The cutting-edge of the stamp mold becomes blunt.(Blunt cutting-edge of the stamp mold)
As vibration and impact in a long-term, the center line of the punch and die has changed. The axis is noncoincident and has produced the single-side burr.
2) Solution
Guarantee the processing precision and assembly quality of the punch and die. Guarantee the verticality and durability of the side pressure of the punch and stiffness of the whole stamp.
When installing, the proper gap between punch and die should be guaranteed. The punch and die surface should be parallel with the working surface of the press machine.
The press machine should have good stiffness. Besides, small elastic deformation, high track precision and parallel degree of the plate and slide block are required. The press machine should have enough stamping power.
The allowable burr height of the shear cross section
>0.3>0.3-0.5>0.5-1.0>1.0-1.5>1.5-2.0
The thickness of stamp sheet>0.3>0.3-0.5>0.5-1.0>1.0-1.5>1.5-2.0
New testing mold burr height ≤0.015≤0.02≤0.03≤0.04≤0.05
3.The allowable burr height in production.
The stamp part produces buckling deformation
1) cause
The gapped force and the counterforce don’t produce the torque at the same line. (The gap between punch and die is too big, the cutting edge of the die has the back taper or the contacting area between the ejector and the stamp part is too small, all of these will produce buckling deformation).
2) solution
Stamping gap should be reasonable.
The die structure should add the pressure plate (or retainer plate). The sheet should contact with the pressure plate surface and has definite pressure. The pressure plate (retainer plate) contact should be increased and add certain pressure.
Inspect the cutting edge of the die. If there finds any inverse taper, the cutting edge must be repaired properly.
If the shape of stamping part is too complicated and there are many inner holes, it would cause uneven shearing force, please increase the power of pressure plate and compress tightly on the sheet metal strip or use the high precision pressure machine for stamping. The metal sheet should be leveled before stamping. If the duckling deformation still can not eliminate, after stamping, the working part can be leveled again. Clear the impurities in the intracavity of the die. Lubricate the surface of the thin metal sheet. And design the oil through on the die structure.
4. The precision of the out edge and inner hole of stamp part is degraded and the size is changed.
1)Cause
Locating pin and stop pin have changed the position or wear greatly.
The operator’s carelessness makes the feeding deviate from front, back, left and right.
Too low, narrow or wide size precision of the bar stock will make the feeding too difficult to reach the fixed place. The bar stock will deviate from front or back in the feeding sheet. Thus the inner hole and the shape of the stamping part will deviate from front or back greatly.
5.When the hardware stamping part is bent, it is not qualified in the size of shape.
1) Cause
The material rebound results in product failure.
The locating apparatus wears badly. It leads to the inaccurate position of the bar stock. The locating apparatus should be replaced.
In the non oriented bent die, when the pressure machine adjusts upwardly, if the dead position under the pressure machine and the slipping block is not adjusted properly, it will result the bent stamping part unqualified in shape and size.
The die pressing sheet equipment doesn't work or lose control. The pressure force should be readjusted or the pressure force should be replaced so that it can work normally.
2)Solution to reduce the rebound
Choose the stamping sheet with big spring mold power, small yield point and stable mechanical property.
The sheet should be annealed before bending. Soften the cold hardening material before bending.
When the deformation hardly be eliminated during the stamping, the punch and the die should be replaced or be adjusted in inclination in order to make the gap equal or less to the smallest sheet.
Increase the contacting area of die and stamping part. Reduce the contacting area of the punch and stamping part.
Take the steps by "overcorrecting" to decrease the effect of the rebound.
6. The bent part produces crack in the bent position.
1) Solution
Eleminate the burr on the out edge of the bending. The burr will cause the stress concentration. Reduce the bending deformation and clear the burr on this area.
Put the burr side on the inner side of bending die.
When putting the bent part, makes the bending direction perpendicular to the fiber direction of the sheet(rolling direction).
The bending radius can not be too small. If the quality is allowed, the radius should be made as long as possible. The surface of the bending part should be clean without any hump or scar.
Anneal it during bending so as to eliminate the inner pressure. The softened bending part seldom produces the cracks.
Please do put on lubricating oil on the big bent part when bending to reduce the friction.
7. The bent part will deviate during the bending process.
1) Cause
The embryo will slide along the die surface during bending process and cause friction. If the difference between the two sides friction is too big, the embryo will move to the bigger side.
2) Solution
For the configurational asymmetry of the bent part, choose the symmetry bending(for the single side bent part choose to two ones together in symmetry for bending and then devide).
Add the elastic pressure sheet device on the bent die so as to prevent the movement of the embryo during bending.
Choose inner hole and out looking location to make its position precise.
8.scratched surface of bent part
1) Cause and solution
For the continuous working of copper and the aluminum alloy and other soft material, the metal particles or dregs will easily attach on the working part surface and make the part galled greatly. At that time, we should analyze and research carefully on the shape and lubricating oil and so on to avoid the appearance of the particle and dreg and produce the scratch.
If the bending direction and the sheet rolling direction is parallel, the part surface will be cracked and decrease the quality of the part surface. If bend on more than two parts, please try best to guarantee a certain angle between bending direction and rolling direction.
If the burr surface regarded as outer edge when bending, there will easily produce the cracks and galls. Thus take the burr area as the inner side of the bent part when bending.
If the die round radius is too small, the bending part will have the impact trace. Polish the die and increase its round radius, will avoid the gall of bent part.
The gap between punch and die should not be too small. If the gap is too small, the part will become thin and galled. During the stamping, the gap variation should be checked timely.
If the punch gets into the die too deeply, there will produce galled surface on the part. Thus ensure it won't being influenced by the springback, the depth which the punch entering into the die should be reduce to some extend.
In order to make the part fit for precision request we usually use the bent die which the pressure material is on the bottom. Thus when bending, the spring, position pin hole, pallet and discharging hole are all be pressed into trace, so they should be adjusted.
9. The embryo hole moves when bending
1) Cause
The size and position of hole is not correct.(It becomes thin during bending).
The center of the hole is different.(The bending height is not enough high, the embryo is moving and rebounding. The bending surface is fluctuating.
The bending line and the center line between two holes is not parallel. The position which the bending height is less than the smallest bending height becomes like the shape of opening mouth outwards.
The hole which is close to the bent line easily deforms.
2) Solution
If the size and position of the hole is not correct, it is necessary to control the bending radius, bending angle and sheet thickness strictly, repair the neutrosphere of the sheet and the depth, which the punch entering into the die should be appropriate even.
The solution to the different center of the holes:
Make sure the correct height of the right and left bending.
Repair the wearing position pin and position sheet.
Reduce the springback so as to guarantee the parallel degree and flatness.
Change the technique routine. Correct bending first and then punching.
The solution to opening mouth shape outwards:
Guarantee the smallest height during bending. H(H≥R+2t t sheet thickness R the bending radius).
Change the processing part outlooking. Without the influence by the usage, get rid of the part which is less than the smallest bending part.
The solution to the deformation of hole caused by the bending part:
When designing the bending part, please guarantee the distance from bending part to the hole X should be greater than a certain digit X≥(1.5—2.0)t t the thickness of the bending sheet.
Design a via hole at the bending part to attract the bending deformational stress. This can prevent the deformation of the hole close to the bending part. Usually choose bending first and then stamping.
10. The part becomes obviously thin after bending:
1) Solution
The bending radius is too small comparing to the sheet thickness(r/t>3 right angle bending) usually choose to increase the bending radius.
Multi-angle bending makes the bending part thinner. In order to reduce thinning, please choose the bending method of single-angle multiple operation.
If we use the sharp punch for entering the die, the thickness of the bending part will decrease obviously when the depth is too big.
11. The flange of drawing part becomes wrinkled during the drawing.
1) Cause
The edge pressure of the flange part is small. It can not afford the super cutting pressure. This causes the deformation of the cutting direction. Thus it forms wrinkle after losing stability. If the sheet is too thin, it causes the wrinkle easily.
2) Solution
Increase the edge pressure on the pressure circle and add the thickness of the sheet properly.
12. The cause and prevention for the crack of drawing wall part.
1) Cause
The sheet bears too much radial tensile pressure when drawings.
The round angle radius of the die is too small.
The lubricating of the drawing is not good.
The plasticity of the rawl material is too bad.
2) Solution
Reduce the edge pressure.
Increase the round angle radius of the die.
Use the lubricating oil correctly.
Choose the good material or increase the annealing process.
13. The bottom of the drawing part is shattered.
1) Cause
The round angle radius of the die is too small. The sheet is in the state of being cut.
2) Solution
(It usually occurs in the initial state of the drawing.) Increase the round angle of the radius of the die and makes the smooth surface roughness smaller than the usual Ra<0.2µm.
14.The edge of the drawing part is uneven and wrinkled.
1) Cause
The embryo doesn’t conform to the center of the punch and die. The sheet thickness is uneven. The round angle radius of the die and the gap between punch and die is uneven. The round angle radius of the die is too big and during the last stage of the drawing, it leaves the pressure circle. And makes pressure circle, which haven’t passed the round angle and doesn’t press the round angle and becomes wrinkled. After that, it is drawinged into die and forms into peristoma fold.
2) Solution
The die should be relocated. Correct the round angle radius of the die and the gap between punch and die, makes them even and then put them into production(reducing the round angle radius of the die or choosing the arc pressure ring equipment will eliminate the fold.
15.The tapered part or the hemispherical part is wrinkled in the waist when deep drawing.
1) Cause
At the beginning of the drawing, most material are in the dangling state. Also the edge pressure is too small. And the round angle radius of the die is too big or the lubricating oil is over used. These makes the radial tensile stress small and the material loses the stability under the cutting pressure and get wrinkled.
2) Solution
Increase the edge pressure or choose the rolling steel structure. Reduce the round angle radius of the die or add a few thickness of the sheet.
16. The drawing part produces drawing trace on the surface.
1) Cause and Solution
The surface of punch and die is crushed. This cause the drawing stamp on the part surface. We should repair or polish the crushed surface.
The over small or uneven gap of the punch and die will scratch the part surface when drawing. The gap between punch and die should be adjusted to be fitness.
The round angle surface of die is rough. The part surface will be scratched when drawing.
The round angle radius of die should be polished and repaired.
As the operation surface and the sheet surface of the die is(are) not clean during the stamping, the sundries would sneak into it, thus the part surface is crushed. Therefore when drawing the surface of the punch and die should be clean. The billets should be scrubbed before drawing.
When the rigidity of die is slow, if there are metal sweeps attached on its surface, the drawing part will produce the drawing stamp. Besides increase the rigidity of the punch and die surface, we should take frequent check of the punch and die surface when drawing and get rid of the metal sweeps in time. The poor quality of the lubricating oil will increase the surface roughness of the part when drawing. We should choose the lubricating oil during fit for the drawing technology. If necessary, the lubricating oil should be filtered before use. These will prevent the sneaking of the impurity and scrubbing of the surface.
17. The straight wall part of the drawing is not flat.
1) Cause and Solution
There is no air hole on the punch. Because of air compression, the punch surface gets deformed and becomes unfair. The air hole should be added.
The rebound of the sheet will also makes the drawing part unfair. The reshaping procedure should be added in the last stage.
Send your message to this supplier
Related Articles from the Supplier
The Cause and Solution to Hardware Stamping Defect
- Feb 17, 2017
The Cause and Solution to Hardware Stamping Defect
- Apr 20, 2017
The Advantages of Aluminum Alloy Die Casting
- May 26, 2017

The testing method of a thread
- Jun 14, 2018


Related Articles from China Manufacturers
The Cause of the Leakage of the Tee and Its Solution
- Sep 24, 2021


The purpose of forging and causes of forging cracks
- Feb 28, 2019
The purpose of forging and causes of forging cracks
- Feb 28, 2019
Related Products Mentioned in the Article


Supplier Website
Source: http://www.junyingmetal.com/the-cause-and-solution-to-hardware-stamping-defect.html