Best Practices for Plug Valve Installation and Maintenance
Plug valves are essential components in many industrial and household piping systems, providing reliable fluid shut-off and flow control. Thanks to their simple structure, ease of operation, and fast opening and closing speed, plug valves are widely used in industries such as petroleum, chemical, mining, water supply, and heating. However, the actual performance and service life of a plug valve depend not only on product quality but also on proper installation, correct selection, and regular maintenance. Improper installation can cause leaks, jamming, or even equipment damage; incorrect selection can lead to premature failure; and lack of maintenance can shorten service life and increase operational risks.
This article provides a systematic overview of plug valves, starting from fundamental understanding, through pre-installation preparation, detailed installation procedures, post-installation testing and commissioning, selection criteria, common fault handling, and routine maintenance. By following this guide, readers can master the complete process, from preparation to installation and long-term upkeep, ensuring that plug valves operate safely, stably, and efficiently under various conditions.
Understanding Plug Valves
Before beginning installation and maintenance, it is essential to develop a clear understanding of plug valves. Knowing their basic definition, main types, and typical applications lays the foundation for proper selection, correct installation, and effective maintenance. This section introduces plug valves from three perspectives: definition, main types, and applications.
1. What is a Plug Valve?
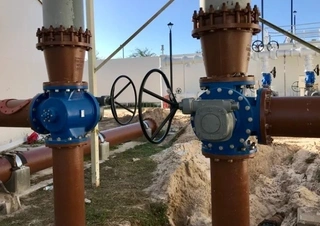
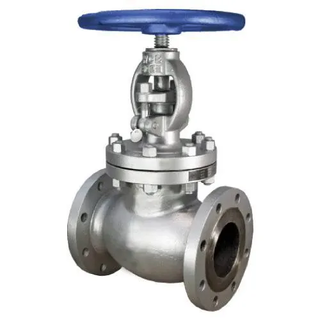
A plug valve is a valve device that controls fluid flow by rotating a cylindrical or conical plug inside the valve body. Its operating principle is simple and straightforward: rotating the plug 90 degrees switches the valve between open and closed positions. Due to its simplicity and rapid operation, plug valves are commonly used in both industrial and household piping systems. As a traditional quarter-turn device, plug valves perform reliably in high-frequency operation scenarios, allowing quick fluid shut-off or engagement.
2. Main Types of Plug Valves
Common plug valves include two-way plug valves, lubricated plug valves, and self-sealing plug valves.
Two-way plug valves are the most frequently used type, with fluid entering and exiting on different sides of the valve body.
Lubricated plug valves are equipped with a dedicated lubrication system, requiring regular inspection of the oil path and timely replenishment of lubricant.
Self-sealing plug valves feature drainage holes that must be checked and cleared regularly to prevent debris from compromising the seal.
In specialized industries such as mining and petrochemicals, eccentric plug control valves may be used to address coking and medium erosion issues.
3. Applications of Plug Valves
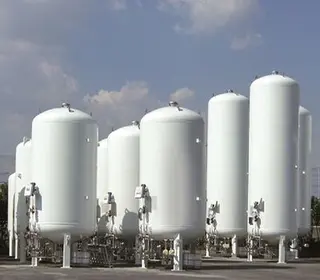
Plug valves are suitable for applications requiring rapid fluid shut-off. In industrial sectors like petroleum, chemical, and mining, they control the transport of raw materials and products. In urban water supply and heating systems, plug valves manage pipeline connectivity. Household systems may use smaller plug valves to regulate water or gas lines. When selecting a plug valve, factors such as medium characteristics, operating pressure, ambient temperature, and corrosive or abrasive conditions must be considered.
Pre-Installation Preparation for Plug Valves
Proper preparation before installing a plug valve is crucial to ensure installation quality and safety. Preparation involves checking tools and materials, inspecting the valve and pipeline, planning the installation location, and establishing safety procedures. Each aspect is detailed below.
1. Tools and Materials
Before installation, gather all necessary tools and materials. Basic tools include pipe cutters, pipe wrenches, torque wrenches, measuring tape, and cleaning cloths. Sealants such as PTFE tape, sealing compound, and gaskets must also be prepared. For flange-type plug valves, ensure the bolts and nuts meet the required specifications. Additionally, use manufacturer-specified lubricants for the plug and valve body. Confirm that all tools are in good condition to avoid operational issues during installation.
2. Valve and Pipeline Inspection
Thoroughly inspect both the plug valve and the pipeline system before installation. Check for cracks or deformations on the valve body, ensure the plug rotates smoothly, and verify the integrity of seals. Inspect the pipeline for debris, burrs, or irregularities, and clean the pipe ends to remove dust, rust, oil, or other contaminants. The cleanliness of the pipeline interior directly affects sealing performance; any residual debris can cause leaks or valve damage.
3. Installation Location Planning
Measure the pipeline dimensions accurately and mark the valve installation point. Install the valve in a location that allows easy access for operation and maintenance. Ensure compatibility with surrounding equipment and avoid interference. Environmental conditions, such as extreme temperatures, corrosive atmospheres, or potential mechanical impacts, should also be considered when planning the installation site.
4. Safety Procedures
Establish safety protocols before starting installation. All personnel must wear appropriate personal protective equipment, including hard hats, gloves, and safety goggles. When installing or replacing valves in a pressurized system, close upstream and downstream valves to isolate fluid flow, and verify that no residual pressure remains before cutting the pipeline. Prepare emergency measures to address potential leaks or injuries during installation.
Installation Procedures for Plug Valves
Once preparations are complete, installation can proceed. Each step must follow the proper sequence, as the quality of execution directly affects the valve’s sealing performance and service life. Key steps include pipeline cutting and cleaning, sealing and lubrication, valve installation and fixation, flange connection (if applicable), and pipeline system restoration.
1. Pipeline Cutting and Cleaning
For new installations or valve replacements, first cut the pipeline. Close upstream and downstream valves and ensure the fluid has stopped flowing. Use a pipe cutter to make a straight, smooth cut at the marked location and remove any burrs. Remove old valves or fittings with care to avoid damaging the pipeline. Clean the pipe ends thoroughly to eliminate metal shavings, debris, or contaminants produced during cutting and dismantling.
2. Sealing and Lubrication
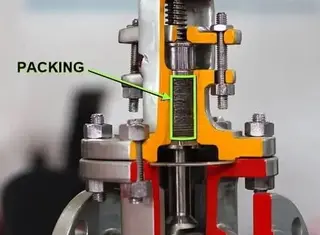
For threaded plug valves, wrap PTFE tape clockwise around the external threads, ensuring even coverage to form a complete sealing layer. Avoid applying too many or too few layers, as excessive layers can damage threads, while insufficient coverage can lead to leaks. For lubricated plug valves, clean the lubrication ports before applying manufacturer-recommended lubricant to the plug and valve body. Proper lubrication reduces friction between metal components and ensures long-term smooth operation.
3. Valve Installation and Fixation
Insert the plug valve into the marked pipeline position, aligning the flow direction indicated on the valve body with the actual flow direction of the system. Ensure the valve is upright and level, avoiding tilting or distortion. Hand-tighten the valve onto the pipeline first to verify proper alignment, then use a pipe wrench to secure the final tightening, controlling torque to prevent thread stripping or body cracking. Ensure the valve remains stable and does not shift under external forces.
4. Special Requirements for Flanged Connections
For flange-type plug valves, align the valve flange precisely with the pipeline flange. Insert bolts through the flange holes and hand-tighten the nuts initially. Use a torque wrench to evenly tighten the nuts according to manufacturer specifications, following a crisscross pattern to ensure uniform load distribution. Proper torque is critical: insufficient torque may cause leaks, while excessive torque can damage gaskets or flange faces.
5. Pipeline System Restoration
After securing the valve, reconnect the remaining pipeline sections using appropriate fittings and sealing materials. For threaded connections, apply PTFE tape on the pipe threads before final tightening. Ensure the pipeline is properly aligned and adequately supported to prevent stress on the valve due to weight or thermal expansion. Insufficient support may lead to cracks or seal failure at valve joints.
Post-Installation Testing and Commissioning
Installation alone does not guarantee operational readiness. Rigorous testing and commissioning are essential to verify sealing performance and operational reliability. Key steps include leak testing, valve operation checks, and pressure testing.
1. Leak Testing
Slowly open the upstream valve to allow fluid to fill the pipeline system gradually. Inspect the plug valve body and all connections for signs of liquid or gas leakage, paying particular attention to threaded and flanged connections. Minor leaks can sometimes be corrected by slightly tightening fittings. Persistent leaks require system shutdown, disassembly, resealing, or gasket replacement before retesting.
2. Valve Operation Check
After passing the leak test, operate the plug valve several times. Rotate the valve from fully closed to fully open and back, ensuring smooth rotation without sticking or abnormal resistance. Confirm that the valve allows maximum flow when fully open and completely shuts off flow when closed. Difficult operation may indicate insufficient lubrication, misalignment, or excessive pipeline stress, requiring adjustment.
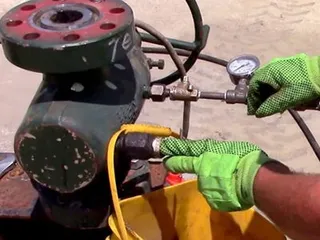
3. Pressure Testing
Before formal operation, pressurize the system to its normal operating pressure and maintain it for a set duration while monitoring all connections for leaks. Pressure testing verifies the reliability of the valve and pipeline under actual working conditions. Record pressure readings for reference in future maintenance.
Key Considerations for Plug Valve Selection
Correct selection is fundamental for long-term, stable operation. Even perfect installation and maintenance cannot compensate for poor initial choice. Selection involves valve type, material and pressure rating, and environmental assessment.
1. Valve Type Selection
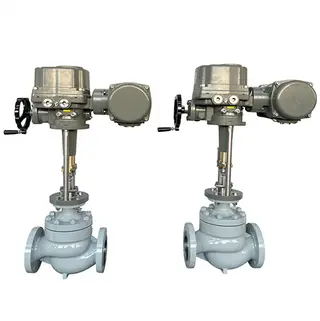
Identify the type suitable for the specific operating conditions. Standard two-way plug valves are appropriate for regular service. For media containing particles or prone to crystallization, consider specialized designs. Frequent operation requires models with high wear resistance. Automated systems may require electric or pneumatic actuators, which must be properly coordinated with the valve during installation.
2. Material and Pressure Rating
Valve materials must be compatible with the conveyed medium. Systems transporting corrosive media require stainless steel or other corrosion-resistant valves. High-temperature media demand heat-resistant materials. Ensure the valve’s rated pressure exceeds the system’s maximum operating pressure to prevent rupture or severe leakage.
3. Environmental Assessment
Consider the working environment, as temperature fluctuations affect seal performance and body stress. Corrosive environments require coated or corrosion-resistant materials. Abrasive media call for hardened plugs and seats. Outdoor valves must also resist UV, rain, and theft. Proper selection extends service life and reduces maintenance frequency.
Common Faults and Troubleshooting
Even with correct selection, proper installation, and regular maintenance, plug valves may develop issues over time. Quickly diagnosing and addressing faults is key to uninterrupted system operation. Common issues include seal leakage, difficult rotation, and other faults.
1. Seal Leakage
Seal leakage is the most frequent problem. Check sealing surfaces for scratches or pits and repair if needed. Remove debris from sealing surfaces. For lubricated plug valves, verify oil flow and replenish or replace lubricant as required. Self-sealing plug valves require drainage holes to be clear of obstructions.
2. Difficult Rotation
If rotation is stiff, inspect the stem and plug for obstructions or jamming. Clean internal components, ensure proper lubrication, check for bent stems, and replace damaged handwheels. Improper installation causing pipeline stress may also misalign the plug, requiring repositioning.
3. Other Faults
Incomplete closure may result from worn plugs or deformed sealing surfaces, requiring replacement or repair. Sudden increases in operating torque could indicate internal damage or coking. Actuator faults should be checked for electrical connections, air pressure, or control signals to ensure proper coordination.
Routine Maintenance and Care
While fault handling is reactive, maintenance is proactive. Establishing a maintenance system extends service life and reduces unplanned failures.
1. Regular Inspection Plan
Schedule inspections to check for corrosion, damage, leaks, smooth plug rotation, and seal aging. Increase inspection frequency under harsh conditions. Early detection allows timely repairs, preventing unscheduled downtime.
2. Lubrication
Lubrication is critical. Use manufacturer-approved lubricants, and follow recommended intervals for plugs, stems, and lubrication ports. Clean surfaces before lubrication to prevent introducing debris. Proper lubrication reduces friction, lowers operating torque, and prolongs valve life.
3. Maintenance Records
Document every installation, test, inspection, and repair, including dates, test pressures, leak results, lubrication details, and anomalies. Complete records aid troubleshooting, demonstrate compliance, and support effective equipment management.
Conclusion
Proper installation, correct selection, and routine maintenance are the three pillars of safe and reliable plug valve operation. Installation emphasizes preparation, precise execution, and rigorous testing. Selection requires consideration of medium, pressure, environment, and operation frequency. Maintenance focuses on scheduled inspections, lubrication, and thorough record-keeping.
Preventive maintenance is far more valuable than reactive repairs. Regular checks for seal aging, insufficient lubrication, or component wear allow timely intervention, avoiding costly emergency repairs and unplanned downtime. All procedures must strictly follow manufacturer specifications and safety guidelines.
Whether for large industrial pipelines or simple household water systems, the reliable performance of plug valves relies on disciplined management. This guide provides practical instructions on installation, testing, selection, and maintenance, helping users fully leverage plug valve advantages for safe, efficient, and stable fluid control systems.
Send your message to this supplier
Related Articles from the Supplier
Related Articles from China Manufacturers
Best Practices for Electric Control Valve Operation
- Jun 25, 2024
Best Practices for Valve Greasing and Maintenance
- Dec 18, 2024


Related Products Mentioned in the Article
Zhejiang Kosen Valve Co., Ltd.
- https://www.kosenvalve.com/
- Business Type: Industry & Trading, Manufacturer,
Supplier Website
Source: https://www.kosenvalve.com/media-hub/best-practices-for-plug-valve-installation-and-maintenance.html